
With food prices rising in the grocery stores, isn’t is great to know that you can easily take one product and make it into two?!
Making butter is one of the easiest things to do with fresh milk and it can be done with everyday items you already have in your house! I am really fortunate to have a (very old) electric butter churn which saves time. But I have also “churned” butter in a mason jar with my kids when they were little by passing around a mason jar half full of cream while watching a movie and taking turns shaking :) Either way, nothing beats fresh butter you make yourself!
Here is what you need to make butter from fresh, unhomogenized milk. Please note all utensils should be sanitized prior to use. Sanitizing may be done easily in 1 of 3 ways : In water at least 170 degrees F for 30 seconds OR in a sanitizing solution using 1 T bleach to 1 gallon warm water OR in the dishwasher on a sanitize cycle.
ladle
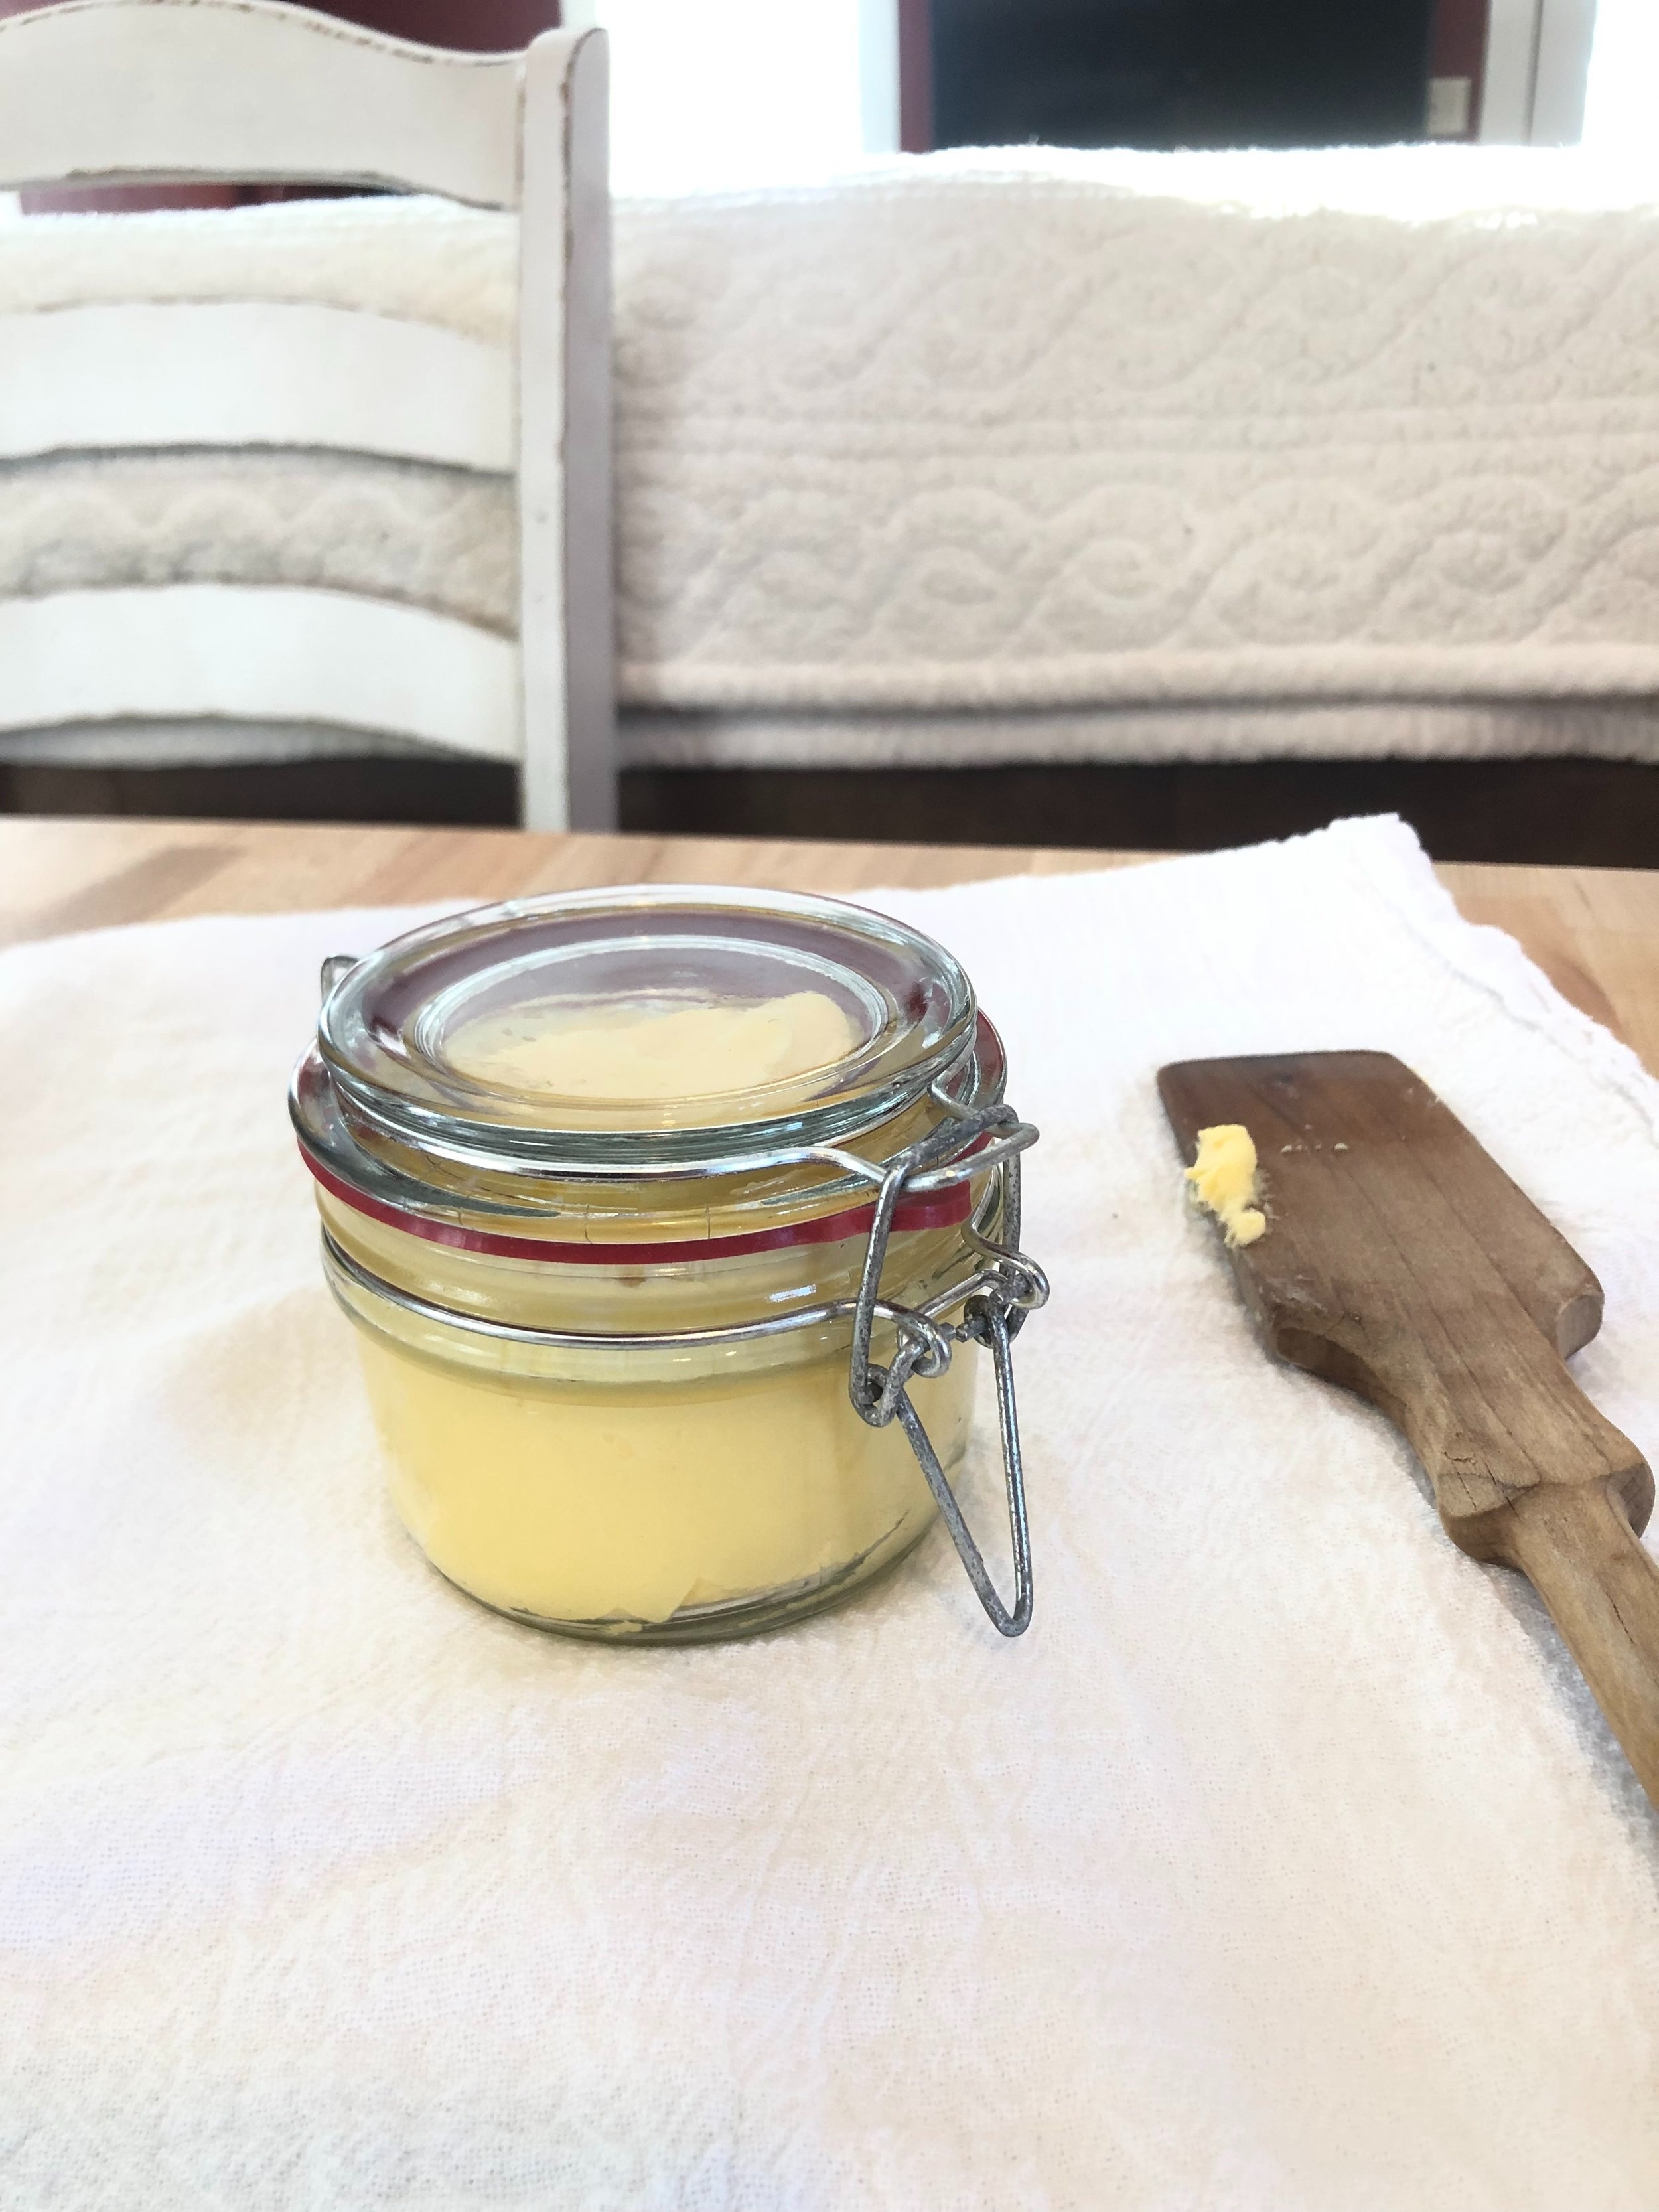
storage jar for the butter
colander
wooden spoon
salt
paper towels, cheesecloth or butter muslin
butter making apparatus: kitchen aid mixer, food processor, stick blender, hand-crank churn, churn with dasher, an empty bottle or an electric churn. This example is done with my electric churn which will churn a half gallon of cream.

Step 1:
Skim the heavy cream from the top of the jar with a clean, sanitized ladle into your preferred container. Make sure to leave the jar no more than half full to allow room for mixing to occur.

Step 2:
Let cream sit for about an hour to warm slightly. This speeds up the time it takes for the butter to form.

Step 3:
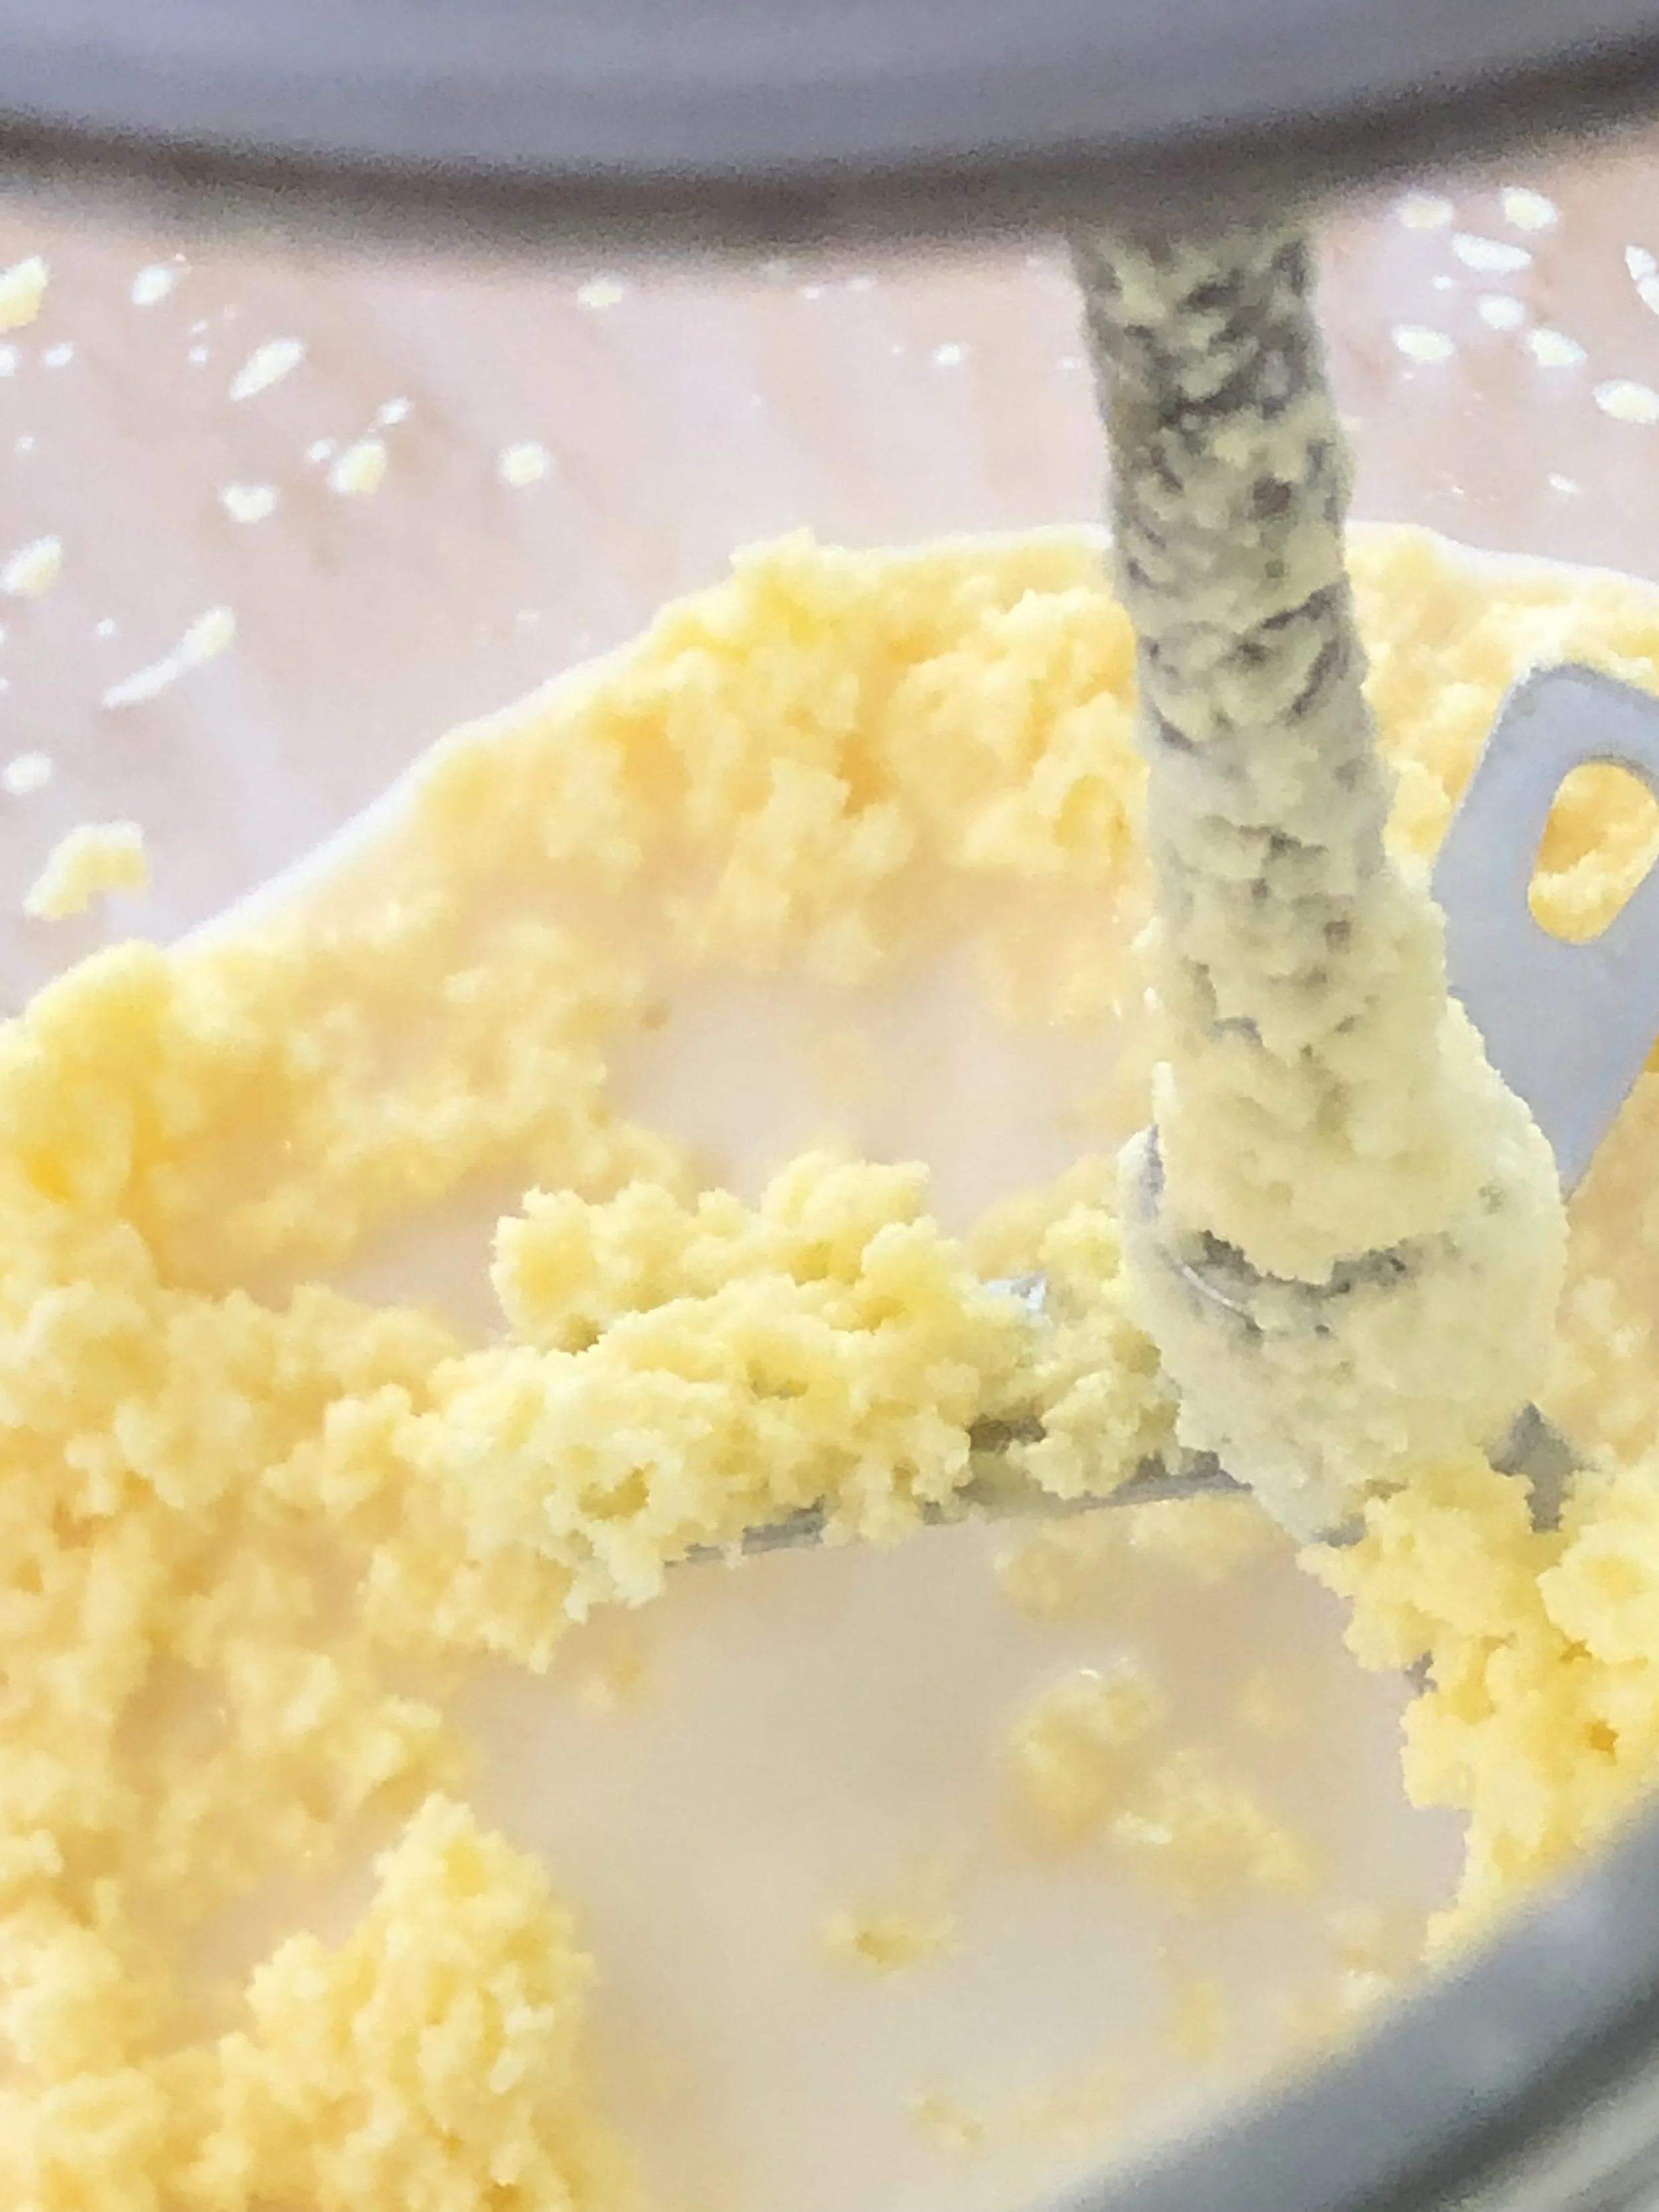
Shake, mix, blend, crank… or in this case simply plug in! As this process is going on, you will see the cream go through several phases from liquid to a thicker liquid to a paste with flecks of butter. It’s still not done! At the last phase, all of the butter globules will coalesce and separate from the buttermilk.

Thickened cream

Beginning to form butter
Butter formed and separated from buttermilk
Step 4:
I then to ‘plour,’ (that is plop and pour) my butter in a colander to drain the buttermilk from the fresh butter for use in a biscuit or pizza crust recipe! Once separated, the butter must then be “washed” by running it under cold water. Using a wooden spoon, press the remaining buttermilk out of the butter until the water runs clear. This step is important as it will help keep your butter fresher longer. How long will your butter stay fresh? Well, I have heard recommendations of keeping raw cream butter up to 2 weeks in the refrigerator. That said, I just finished up using some that was 6 weeks old and I’m still here talking about it! I think sanitation is absolutely key when working with fresh dairy products, which starts with low bacterial counts in the milk . This is why I am a firm believer of having a relationship with your farmer if you are purchasing direct, or intermittently testing milk from your own animals.

Butter just poured from mixing jar

Beginning to rinse and work the butter with the wooden spaddle
Step 5:
Add other ingredients and mix well. I don’t get real fancy with my butter, but I do like to put salt in it. About 1 tsp per lb. is the average recommendation.

Step 6:
Blot dry to absorb any final moisture and place in your preferred container. I use a paper towel for this and then grease my cast iron cookware! From this batch, I yielded 5.3 oz of butter from just under 1 gallon of whole Jersey milk at approximately 5.5% fat. If I assume I had 8.5 lbs of milk in that gallon (136oz) x (0.055) I should have expected around 7.48 oz of butter. I presume my losses to be slightly from the process itself (some gets trapped in the muslin or colander), plus I do not over skim my milk so that some of the tasty cream layer is left behind in the milk jar to enjoy!

Let me know how yours turn out!